Showing posts with label supplies. Show all posts

Thursday, July 12, 2007

My Work Space, AKA My Dining Room Table

There are as many unique work spaces out there as there are unique artists who occupy them. Some use their kitchen/dining room table (like me), some their couch and coffee table, some a tray on their lap, some are even lucky enough to have a work bench or even a studio. I love getting a sneak peek into everyone's "studio." I know it's kind of voyeuristic, but I truly love to see how everyone works, get ideas for my own space (if I'm ever lucky enough), see their tools and materials.

For now, my work space is my dining room table. As many of you in a similar situation knows, sometimes you're lucky enough to be able to leave your materials and tools out and set up mid-project. Then there are those times that your boyfriend wants to have his friends over for a full day of gaming. Well, maybe not exactly that situation, but I think you get the idea. Mid-project or not, you have to clean everything up.


The above photo is of my kitchen table which in actuality is in my dining room, aka my work space. The plain wood table top you see is something that Scott (the boyfriend) built to give us a bigger table space: it's basically a piece of plywood that sits on top of the actual table with a frame so it doesn' t move; it also folds in half for storage. On the bottom left is Scott's Dremel tool which I have kind of pirated away from him to use with my Koil Kutter for cutting jump rings. You can see a batch of freshly cut rings as well as a strainer in which I rinse all of the lube off of them. My Craftsman pliers are out (this pic is obviously from before Scott gave me my beautiful Lindstroms) as well as some mandrels used for coiling. In the background, you can see my light box. This was not one of my more organized days, but then it's always difficult to stay organized in a temporary space.

Here's another shot of my work space. You can see in the background the storage cabinet that Scott and I share and a set of plastic drawers that contain some more jewelry making supplies; my tackle box with even more supplies and tools is on the floor between the two.


On top of the cabinet are two projects: one belonging to me and one belonging to Scott. The grey box laying down is his: it's a dice tower that he built from scratch with wood and felt. You throw dice in and it tumbles them up and then they come pouring out the bottom. It's really quite neat.

The other project is mine, of course: a work in progress coif. In this photo it looks kind of like a wig and I'm thinking of making more like this except in fun colors for all of those punk girls out there. Since this picture has been taken, I've finished it off and must admit, I've been slow to get pictures posted of her all done up.

Scott and I are in the process of trying to buy a house and if any of you have not been through that experience, imagine the most stressful time of your life and multiply it by a thousand. In any event, if all goes well, our new house will have three bedrooms. One of course is for us to sleep, and we were originally planning on having an office for us both in one and a guest bedroom in the other. Recently, we've been playing with a new idea that I think we've both fallen in love with: we're each going to get a room to do with as we please. If we decide to go this route, I'm going to have my own office/studio/workspace!! And then, of course, I'll have to add a new post with more pic's!

Tuesday, July 3, 2007

Etsy Bloggers Street Team Theme: Orange

I've been racking my brain trying to think of a fantastic project I can do using orange jump rings or O-rings, but not having any in stock at the moment put a serious damper on that! But then, I realized that I already have some orange already in both of my shops! I've got some orange pendants in my original Etsy shop, Beach Bum Creations.


But, even more exciting than supplies is something that I've made. Although, not really orange, copper's as close as I've got! You can find this Mobiused Rosette Bracelet in Athena's Armoury, my new shop for chain maille.


That's probably one of my all time favorite bracelets. I made one for myself and always get compliments on it. It was made using 18 gauge copper rings with, I believe, 1/4" inner diameter. It's a variation on the classic Euro 4-1 chain maille weave (most commonly seen in armour).

Cleaning Copper
I've had mine for quite some time now and it's starting to get a little dull, but that's easily fixed. Just mix together some lemon juice and salt, add bracelet, then slosh around a little bit. However, you must make sure you rinse it off!! The salt will make the bracelet crusty if you let it sit and the acid in the lemon juice will eat away at the metal. If you want to make extra certain it's clean of the lemon juice solution and perhaps keep the shine a bit longer, you can make a paste with baking powder and water and rub it on the copper. This will neutralize the acid. Then, of course, rinse again and dry. Beautiful, shiny copper once again!

Wednesday, June 20, 2007

My Fabulous New Lindstrom Pliers

When you make chain maille, you need to use one pair of pliers in each hand in order to twist the rings either open or closed. Some people think that you just pull the connecting ends of the rings apart, but if you do that, you'll lose the circular shape of the ring. If you twist one half of the ring towards you with one plier and the other half away from you with your other plier, you can then close them (going in the opposite direction) and keep the ring in it's shape.

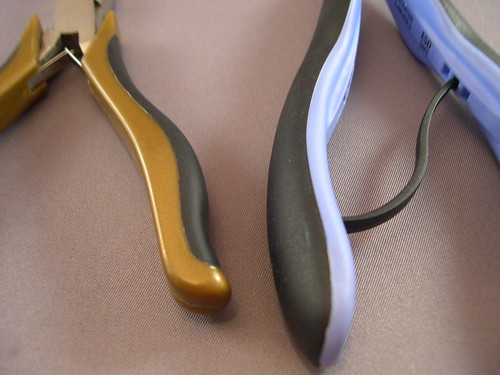
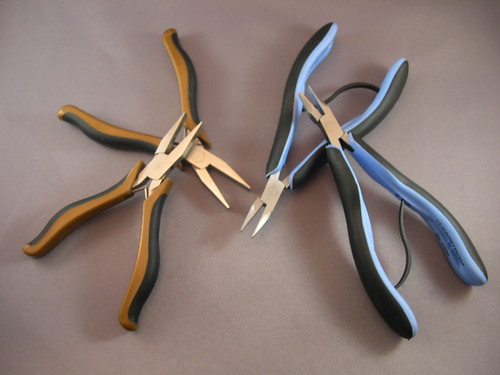
I first started making maille with a pair of chain nose pliers: picture your average every day joe pliers, except a bit shorter and non-serrated (non-serrated means without teeth which is important so that you don't mar your metal). I wasn't too crazy about these pliers because it felt like I didn't have enough control over the rings (lack of surface area). I wanted to try a pair of flat nose pliers and my carpenter boyfriend suggested getting some from Craftsman (the gold ones in the photos).

The problem I was running into with these guys was the notch on the handle. It literally kept bruising my palm and then I would lose weaving time because I wanted to try and let it heal a little bit. Poor Scott started to feel bad since he was the one who recommended them to me.


Connie Fox's website. She's got lots of fabulous wire working supplies, decent prices, great customer service, and quick shipping. Needless to say, I found what I was looking for and on sale, no less! It had been about a week and I hadn't gotten around to ordering yet. But, in that time, little did I know that Scott went ahead and ordered my fabulous Lindstrom Flat Nose Pliers from her already and asked her to not fill my order (when and if I would ever get around to placing it) because he wanted to give them to me for a present. She was way cool and said no problem.


So now I've got my fabulous new Lindstrom pliers that I just love. The grips are longer allowing for better leverage (and no notch!), they have way more cushion, and you can even adjust how much the jaws open! I love them!