Hello friends! I've missed you! It's been a long couple weeks... It seems weird to just jump right back into things, so I just thought I'd say hi and give you guys a little update.
The great news is that I had a bunch of much needed work these past couple weeks (both framing and theater work!). The bad news is that there's a bit of stress going on right now as Scott & I wrestle with a difficult decision. I can't really talk about it right now, but when we figure things out, I'll share.
In the meantime, I have a bit of fun news! My Recycled Spoon Garden Markers Tutorial is featured over on Handmadeology! It's right on the front page! I don't know how long it will be there, so the direct link to the post can be found here. I'm so excited!
Okay, I promise to try and get back into the swing of things and start posting regularly again. =)

Wednesday, August 31, 2011
Tuesday, August 16, 2011
Warrior Salve for Sore Muscles, Strains, Sprains, and Bruises
I've talked about it off and on here at the blog and often on twitter but as of a few weeks ago, my Warrior Salve for Sore Muscles, Strains, Sprains, and Bruises was finally made available in my Artfire Studio and in my Etsy shop! This salve is perfect for athletes, weekend warriors, and everyone in between primarily for helping relieve sore muscles.

This is a recipe that I developed last year while I was training for the Susan G. Komen 3 Day for the Cure. My training consisted of walking around 500 miles in preparation for the event where I walked 60 miles over the course of three days in order to raise awareness of the fight against breast cancer. I had a lot of problems with my feet in training and know many walkers who had very, very sore muscles not to mention strains and sprains. My Warrior Salve was inspired by these walkers that kept going no matter what, knowing that they were walking for something much bigger than themselves and their pain.
I asked some of my 3 Day walker friends to test out my Warrior Salve, knowing that I couldn't find a better group of people to really put it to the test and give me honest feedback. The feedback was overwhelmingly positive.
-I LOVE this muscle salve! I've been able to use it on a few different types of muscle pain (e.g., tired muscles, sore muscles, and injured muscles) and found the salve to be effective on each type. Most pains were alleviated after one use while more severe injuries felt improvement over a couple days. And best of all...no stinky medicine smell! ~ Jami
-You need some of @AthenasArmoury's sore muscle salve. It's *amazing* and works on everything from torn ligaments to bruises. ~Pam

Pain relieving, anti-spasmodic organic herbs were infused in medicinal olive oil and blended with essential oils and beeswax to create this salve. Just rub a little in where you feel sore (the rubbing is an added bonus of giving yourself a little massage) and wait for the herbs to work their magic.
This is a recipe that I developed last year while I was training for the Susan G. Komen 3 Day for the Cure. My training consisted of walking around 500 miles in preparation for the event where I walked 60 miles over the course of three days in order to raise awareness of the fight against breast cancer. I had a lot of problems with my feet in training and know many walkers who had very, very sore muscles not to mention strains and sprains. My Warrior Salve was inspired by these walkers that kept going no matter what, knowing that they were walking for something much bigger than themselves and their pain.
I asked some of my 3 Day walker friends to test out my Warrior Salve, knowing that I couldn't find a better group of people to really put it to the test and give me honest feedback. The feedback was overwhelmingly positive.
-I LOVE this muscle salve! I've been able to use it on a few different types of muscle pain (e.g., tired muscles, sore muscles, and injured muscles) and found the salve to be effective on each type. Most pains were alleviated after one use while more severe injuries felt improvement over a couple days. And best of all...no stinky medicine smell! ~ Jami
-You need some of @AthenasArmoury's sore muscle salve. It's *amazing* and works on everything from torn ligaments to bruises. ~Pam
Pain relieving, anti-spasmodic organic herbs were infused in medicinal olive oil and blended with essential oils and beeswax to create this salve. Just rub a little in where you feel sore (the rubbing is an added bonus of giving yourself a little massage) and wait for the herbs to work their magic.
Monday, August 15, 2011
What's the Dirt on Dirt? Filling the Raised Garden Bed
 I've been thinking A LOT lately about dirt, soil, organic matter, compost, manure, microorganisms, soil amendments, etc. It's been a while since we finished building the raised garden bed and since then, we've spent a lot of time trying to figure out what's going to go in it. Not the fun stuff like plants, herbs, or veggies but the soil. We're probably making this harder than we have to, but I think we're just a bit overwhelmed because we want to make sure we do it right.
We have another yard project going on that will require us to dig up a whole mess of dirt, so we were originally planning on incorporating some of that into the garden bed. We figured it would be a good way of upcycling something and also help us keep our costs down so that we don't have to buy as much of the amendments to make it good soil.
I sent a soil sample in to Florida's Extension Office to be tested and found out that our soil is a little too alkaline and that I would need to add some organic matter to increase the acidity. Okay, I get that but at what ratio? I spoke to a nice guy at the Extension office and he said to mix it half and half with compost. Apparently, you can never have too much compost. Needless to say, I was still feeling a bit unsure about all of this.
The next step in my journey to learn about dirt was at an organic soil prep workshop. One of the first things that the Master Gardener made us understand is that grass is persistent. Unless you completely pull up ALL of the roots, you will not get rid of it and it will grow back. This is why when you compost grass, it should only be grass clippings and not roots: you don't want your compost bin or where you incorporate your compost to start sprouting grass. The areas that are going to be dug up in our yard won't be terribly deep, so we figured that unless we spend A LOT of time sifting that dirt it won't be terribly useful thanks to that persistent grass.
Ultimately, it looks like we're going to be ordering a few yards of organic soil to fill the raised garden bed. This way, we know that it's exactly what the plants need, don't have to worry about figuring out the right proportions of things to add to our soil, and it will save us time and energy so we can focus on our other project.
We're in the middle of the hottest and wettest time of year down here, so I think we're going to wait until some time in September or even October maybe to get the bed filled. I don't want to plant any new greenlings in this and have them stressed before they even have a fighting chance to grow. Not to mention, I don't want to work in this heat, either!
I've been learning a lot about amendments to the soil, mulching, feeding, and watering, too. But that's for another day and another blog post.
Sunday, August 14, 2011
Simple Joy Sunday
Some happy highlights of the week...
Spent an afternoon floating in the pool and enjoying a beer. It was so relaxing. Basically, my summertime equivalent of a hot bath in the winter.
Graphic design continues to be a challenge for me, but I learn a little something every time I play. Artfire's new studio design forced me to play again since the banner size changed. I'm pretty satisfied with how it came out. It's very simple, but it works.

They also gave us a few more ways of customizing the shop. Let me know what you think!
One night this week, my honey greeted me at the door with a Long Island Iced Tea. That was awesome.
I signed up for another website that will offer me sponsored blog posts. Nothing has come of it yet, but I'm excited about adding another one to my arsenal. As always, I promise I won't falsely review anything and will always cover sponsored posts with my own unique angle that will, hopefully, be interesting to my readers. Times are tough, work-wise, so every little bit really helps a lot.
I'm still loving the 30 Day Shred ! Yup, Level 3 is a challenge, but it makes me feel strong whenever I do it and that definitely makes me happy.
I did a number on my nerves when I got my part time job schedule for the coming week. Hours are getting less and less (for all of us in the department) and theater work has pretty much come to a freaking halt for me. I'm really, really starting to get worried. But, I went out one night with a friend from the Herb Society and had a chance to decompress. We both needed it. I'm really grateful to have her friendship.
I joined a new street team on Etsy: Tampa Bay Etsy Crew. I'm hoping that this will be a way of meeting local crafters, forming some friendships, and maybe even a good resource for finding out about shows.
Scott & I attended a free soil prep workshop. I'll have to tell you more about that in a different post!
What made you happy this week? Please share in the comments!
Spent an afternoon floating in the pool and enjoying a beer. It was so relaxing. Basically, my summertime equivalent of a hot bath in the winter.
Graphic design continues to be a challenge for me, but I learn a little something every time I play. Artfire's new studio design forced me to play again since the banner size changed. I'm pretty satisfied with how it came out. It's very simple, but it works.
They also gave us a few more ways of customizing the shop. Let me know what you think!
One night this week, my honey greeted me at the door with a Long Island Iced Tea. That was awesome.
I signed up for another website that will offer me sponsored blog posts. Nothing has come of it yet, but I'm excited about adding another one to my arsenal. As always, I promise I won't falsely review anything and will always cover sponsored posts with my own unique angle that will, hopefully, be interesting to my readers. Times are tough, work-wise, so every little bit really helps a lot.
I'm still loving the 30 Day Shred
I did a number on my nerves when I got my part time job schedule for the coming week. Hours are getting less and less (for all of us in the department) and theater work has pretty much come to a freaking halt for me. I'm really, really starting to get worried. But, I went out one night with a friend from the Herb Society and had a chance to decompress. We both needed it. I'm really grateful to have her friendship.
I joined a new street team on Etsy: Tampa Bay Etsy Crew. I'm hoping that this will be a way of meeting local crafters, forming some friendships, and maybe even a good resource for finding out about shows.
Scott & I attended a free soil prep workshop. I'll have to tell you more about that in a different post!
What made you happy this week? Please share in the comments!
Thursday, August 11, 2011
Getting Started Building Your Website
Deciding to create a new website can be a little daunting, but just like anything in life it is the challenge ahead and the goal at the end that leads you to experience and knowledge of things that you would ordinarily only dream of doing. Many years ago I decided to open an online business on EBay selling beads and other items that I thought were cool. That worked pretty well and eventually I needed a website, too. I am now on my 3rd website, and each time I upgraded to something a little better to stay in step with technology and incorporate more functions. If you are selling products, the shopping cart and how it is connected to the payment gateway is very important, as well as ease of use for the customer. That is where I become stupid, it is tricky and I really don't have time to learn that end so on this third website I hired an agency with design, technical and promotion experience to help me out. Most developers will only set things up and load maybe 50 products. After that they teach you and you have to do all the work, unless you want to pay them a whole lot more money. Really you are better off doing it yourself anyway, because you know your product better than they do.

I learned a few things from these three different website experiences, and the most important thing I learned is that while you need someone to help you with all the technical mumbo jumbo and programming, many times you are better off doing it yourself. Once you find this person to help you out, hook everything up correctly and pay their fee, you can never find them again! Then you're in a real mess and there's no one around so you just have to wing it and figure things out for yourself. Everyone knows someone who knows html or programming but they are like Gnomes hiding under a rock or in the trees. When you go looking for them again, they have up and vanished!
A lot of websites today come with built in editors that will do the html for you. But it's always a good idea to know a little of the basics like how to make things bold, make something italic, etc. Lots of times those editors get all jumbled up with different things everytime you change something, so you can just view the code and take out all the extra stuff if you know what to look for.
Basic html examples:
For more instances this is a great source http://www.ncsu.edu/it/edu/
For more instances this is a great source http://www.ncsu.edu/it/edu/
<p> causes a line break and adds a trailing blank line for paragraphs, to end a paragraph use this at the end </p>
<br> causes a line break with no trailing blank line if you just want to bring something down one line
This is a <b>boldface</b> tag.
This is how boldface appears.
This is how boldface appears.
This is an <i>italic</i> tag.
This is how italics appear
This is how italics appear
After those few things it's all pretty easy if you take things in steps. If you try to do everything all at once it is very overwhelming! Here are a few other things to think about:
Domain names and hosting: Match your domain with your brand. Most hosting companies can help with your domain name, but be sure to get a hosting company that has real people working there so you can talk to someone if you need help.
Branding: Use the same colors, logos, design (if possible) in all other areas like Facebook, Twitter, Etsy, Blog etc. This way the customers are used to seeing the same things and will know it's YOU!
Image: Decide what kind of image you want to portray to the world, what kind of customers do you want, what do you want the customer to feel when they see your front page? Do you want them to read or buy? Think of things like that to help put together what your image will be in their eyes.
Photos: Invest in a good camera and photo editing program, it really makes a difference in the quality of the picture and what your customer sees. Etsy has some great write ups on photography. A picture REALLY is worth a thousand words!
Image names: If you are selling products and you have a LOT, be sure to start using a good image naming system so that you can find the pics when you need to. I use the manufacturer's product code along with a prefix that I assign to them. Example: BI-BS202 - which is used for the image and the item code. Image management can be time consuming if you don't have some organization in the beginning.
Organize products: Do an outline or spreadsheet to help decide how to organize your products so the customer will have an easy time finding what they want. You may change your mind later, but if you have an outline in the beginning it makes it easy to know what you have, how products might work with each other as cross selling, etc.

Product Descriptions: You can do it however you want, but I think it should be fairly short. When people are shopping on the internet they usually know what they want and will only skim your descriptions.
Security: Make sure your site is secure from hackers, malware, and that encryption is high so there is no risk of your customers information getting into the wrong hands.
Marketing: In my opinion pay per clicks are a waste of money unless you have the time to sit and really figure out how the company presents your ads. I think Facebook, email marketing and good SEO (Search Engine Optimization) are your best bet. Word of mouth is the best advertising of all!
Gari Anne, thank you SO much for sharing all of these great tips!! I for one know next to nothing about html and really appreciate you taking the time to explain some of the basics. Your website looks really great! Check it out: Bead Lover's Korner website, Bead Lover's Korner blog, and Bead Lover's Korner on Etsy. Whew! =)
Next week, we welcome back AJ from ErtheFae's Meandering Thoughts for another installment of ErtheFae's Faerie Lore.
Wednesday, August 10, 2011
Wordless Wednesday: Peppermint Lip Balm
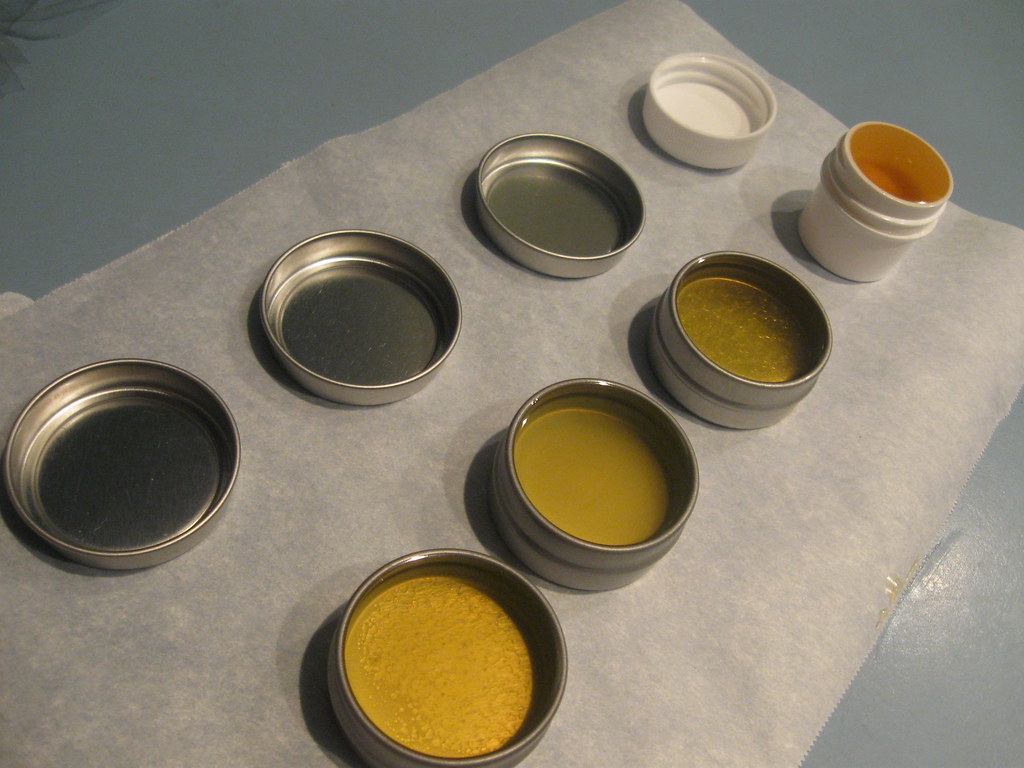
Just made a small batch of minty, moisturizing lip balm. Once they cool and I get some labels put on them, they'll be in the shop!
Tuesday, August 9, 2011
Getting Shredded!!

I weighed in and took my measurements before I started today's workout. My weight is still fluctuating at around the same as when I started but I think that makes sense since I'm adding muscle. You know how I know I'm adding muscle? My measurements are changing. And I feel stronger. I really keep second guessing my measurements, though, because not all of them have changed and I'm so excited that some of them are getting smaller, I keep thinking that they must wrong. Unfortunately, I didn't think to start journaling my progress in pictures until the start of Level 2, so there's only a 10 day span between shots right now. Even in that short amount of time, though, I can see a bit of a difference. When it's all over, I *might* share the before/after pictures.
In Level 3, Jillian really ups the ante by including weights in the cardio and adding even more plyo (jump) training. Like I said, I had to drop down the dumbbell weight on some of the moves, but that's okay because it allowed me to work through them. The plyo has been an issue for my knees (doing jumps on a hard surface like laminate over concrete isn't the best plan). During Level 2, I did as much of the jumping as I could on carpet and that seemed to help. I have an older yoga mat that I might pull out and try using instead (I'm afraid it might move, though).
With only 10 days to go, I've started thinking about what I'm going to do next. Don't get me wrong, this is hard and isn't necessarily the most fun part of my day, but doing it every day have gotten me into a routine. And I like it. It's making me healthy and feeling strong; I also feel more energized and motivated after working out. I'm thinking about checking out something similar like Jillian Michaels Ripped in 30
Sunday, August 7, 2011
Simple Joy Sunday
It was a pretty boring week around here, but let's see if there aren't a few highlights...
I've stuck to the 30 Day Shred despite wanting to call in sick one day and despite not seeing the drastic results that I keep (unrealistically) expecting. Scott keeps reminding me that it's the 30 Day Shred, not the 12 (or whatever) day shred and to chill out about the results; valid point, I guess. I made a commitment to myself to get healthy and to get in shape and sticking this out for this month and planning what I'm going to follow it up with next month is a HUGE part of that commitment. It makes me proud to think that when I set my mind to something like that, I do make it happen. Now, if only I can carry that strength and commitment over to other areas of my life...
Scott and I went to see Captain America this week. Really fun movie, I highly recommend it. Scott is a big old, self proclaimed geek so of course he knows all about all of the comic book characters in the movies of late. I don't. But that's okay because Captain America was a great stand alone movie for someone that doesn't know all of the mythology behind the character. Also, we snuck in snacks to avoid paying $20 for popcorn and soda. =)
Once again, I want to send out a big thanks to all of my friends on the internet that keep giving me a thumbs up when I ask for it!! I've been earning $1 here and there every time I reach a thumbs up goal through Crowdtap. In addition to that, I'm donating a portion of that dollar and Crowdtap is donating 5% of every dollar to Susan G. Komen to fight breast cancer. I may not be walking this year, but I'm still doing what I can, when I can. Plus, those extra dollars that I'm earning for myself through Crowdtap are going towards helping me pay for a couple of things I can really use for work but don't have the spare cash to purchase. So... Thank you!!
I started working on a new recipe for herbal body powder this week. I think I like the base, now I'm starting to play around with ideas for what herbal powders to add to it. This is so fun for me!
My blog was stuck at 178 followers for the longest time and all of a sudden, I'm up to 182! I know it's not a drastic jump, but four new followers within days of each other was a fun little surge. Hi, new followers! Thanks for following!!
In closing, I'd like to share with you a super fun video that Planned Parenthood released in celebration of :
"The Department of Health and Human Services (HHS) has ruled that birth control is basic preventive health care and should be made available to millions of women in the United States without a co-pay. This ruling is a giant leap forward for women's health."
Hope you enjoy the video! Also, I'd love to hear what made you happy this week, so share in the comments below. Have a great Sunday!
Saturday, August 6, 2011
Spoon Garden Markers Tutorial
I've been seeing garden markers made out of spoons everywhere lately. I don't really worry so much about marking my herbs right now because I'm the only one working with them and can identify them. Once we get the garden bed going, though, it's entirely possible that Scott might be more involved so I might need some markers out there. Being the crafty, DIYer that I am, I figured that I could try making them myself.
 The project started with a trip to the thrift store to pick up a bunch of spoons. I think they were maybe $.10 each, so this project doesn't really require that much of an investment.
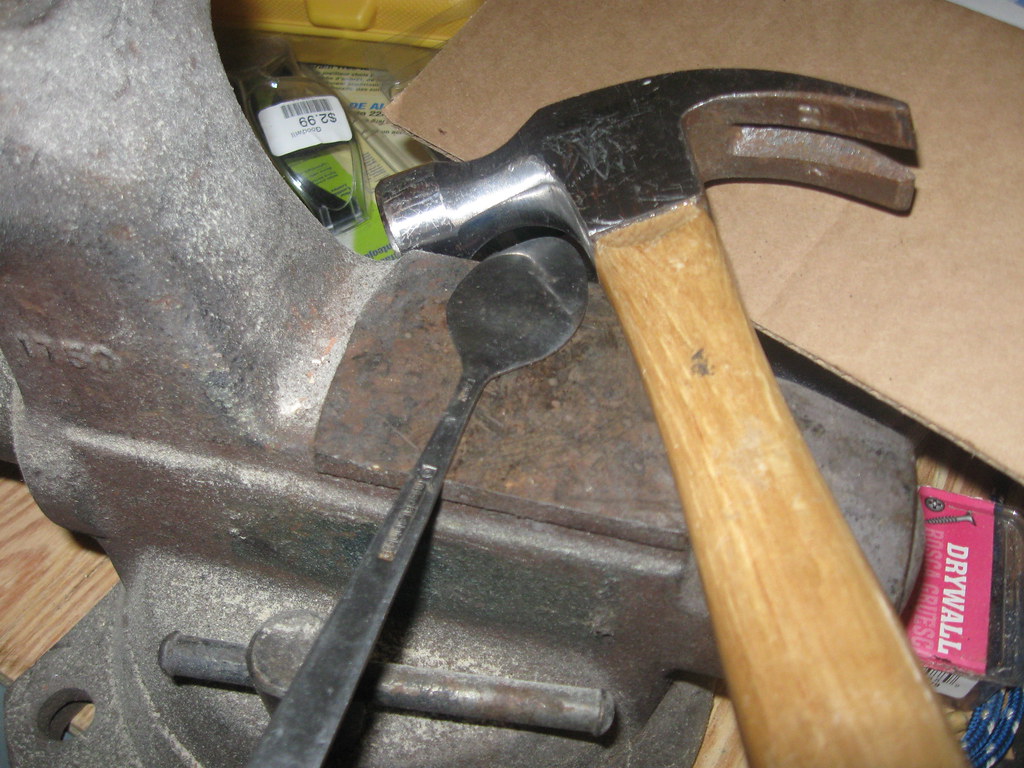
The big tools you'll need include a hammer and a stamping set. You can get the stamps from a craft store, but I highly recommend someplace like Harbor Freight for a project like this where they will only cost around $10-20 (depending on the size).
You'll need a flat surface to hammer out the spoons. You can probably use concrete blocks or something similar. I have a vise (which was in the garage when we bought the house - score!), so I used the steel block on it. The smaller spoons were easier to hammer out than the bigger ones. I couldn't find ours to try it, but I'm wondering if a small sledgehammer might work better than the hammer. Don't be afraid to get some strength behind your swing (they are stainless steel, after all) and make sure you're holding the hammer properly (don't hurt or embarrass yourself with a bad grip!).
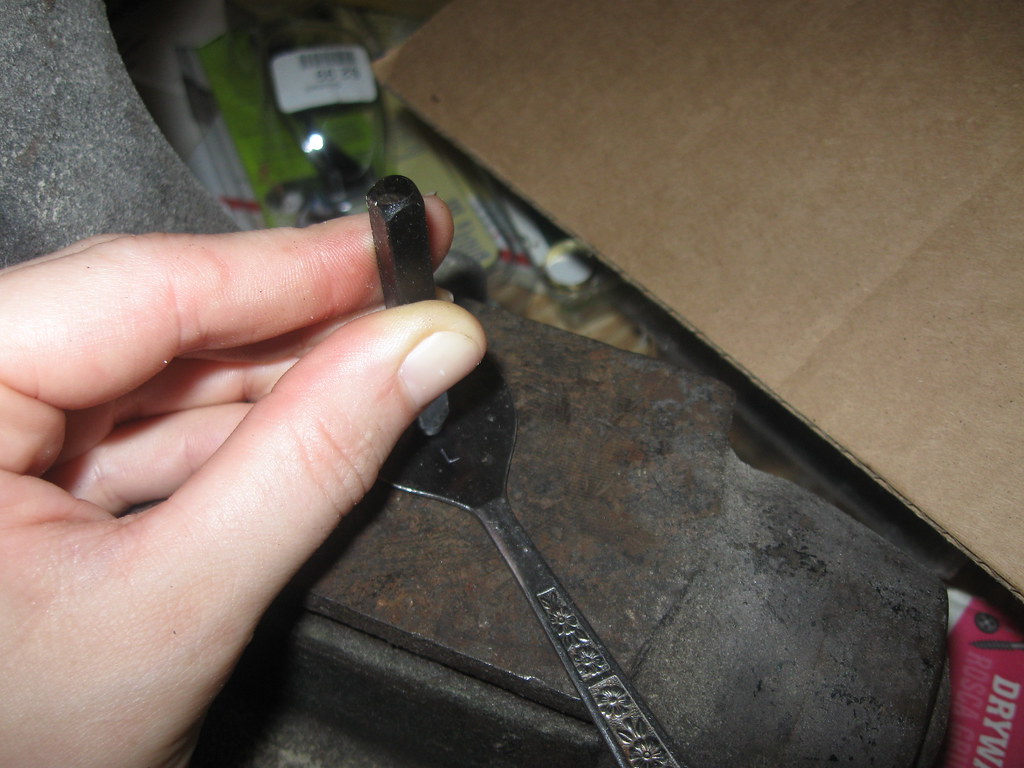
Next step, is stamping. I used my Fine Point Sharpie and evenly spaced out dots where my letters would go so I knew that the word would fit. Make sure you do this on the front of the spoon so that the pattern on the handle shows. When you look at the stamp, the letters are going to appear backwards to you so that they are facing the right way when put to the metal. Line up your first stamp on your first dot and strike it with your hammer. A good, solid strike or two should do the trick. Multiple strikes of lesser force don't really work as well because it's more likely that the stamp will move.
My vise is wedged into a corner of the very crowded workbench in the garage and I didn't have much room to work, so I had a hard time getting the leverage I needed to get my stamping done right. Made me sad, but for now, it's the best I can do.
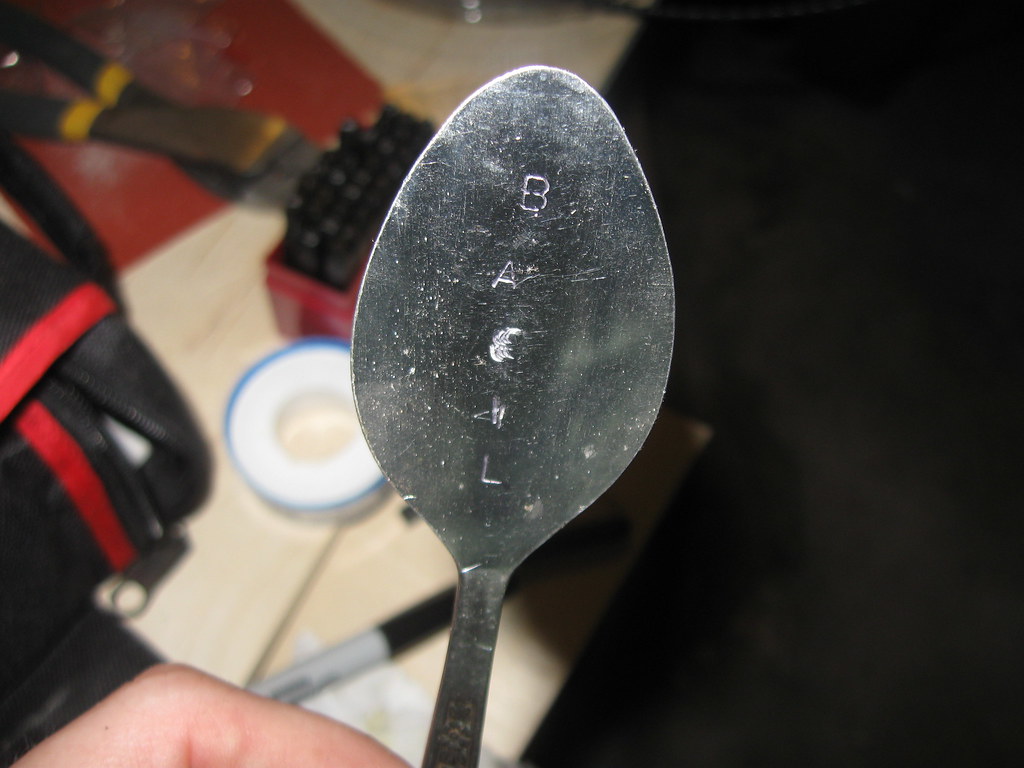
If you want, you can darken up the lettering, too, to make it easier to read. Color in the letters with a Sharpie, being sure to get into the grooves of the letters. Immediately wipe it down with a towel to get the ink off the surface of the spoon and only leave it in the letters.
Eventually, I hope we can get the garage cleaned out enough that the work bench is easier to work on (go figure) so I can try making some more of these for my garden... and maybe to sell in the shop. They're a lot of fun to make, pretty easy, and not that expensive of a project. Let me know if you try it! I'd love to see pictures. What kind of garden markers (if any) do you use?
The project started with a trip to the thrift store to pick up a bunch of spoons. I think they were maybe $.10 each, so this project doesn't really require that much of an investment.The big tools you'll need include a hammer and a stamping set. You can get the stamps from a craft store, but I highly recommend someplace like Harbor Freight for a project like this where they will only cost around $10-20 (depending on the size).
You'll need a flat surface to hammer out the spoons. You can probably use concrete blocks or something similar. I have a vise (which was in the garage when we bought the house - score!), so I used the steel block on it. The smaller spoons were easier to hammer out than the bigger ones. I couldn't find ours to try it, but I'm wondering if a small sledgehammer might work better than the hammer. Don't be afraid to get some strength behind your swing (they are stainless steel, after all) and make sure you're holding the hammer properly (don't hurt or embarrass yourself with a bad grip!).
Next step, is stamping. I used my Fine Point Sharpie and evenly spaced out dots where my letters would go so I knew that the word would fit. Make sure you do this on the front of the spoon so that the pattern on the handle shows. When you look at the stamp, the letters are going to appear backwards to you so that they are facing the right way when put to the metal. Line up your first stamp on your first dot and strike it with your hammer. A good, solid strike or two should do the trick. Multiple strikes of lesser force don't really work as well because it's more likely that the stamp will move.
My vise is wedged into a corner of the very crowded workbench in the garage and I didn't have much room to work, so I had a hard time getting the leverage I needed to get my stamping done right. Made me sad, but for now, it's the best I can do.
If you want, you can darken up the lettering, too, to make it easier to read. Color in the letters with a Sharpie, being sure to get into the grooves of the letters. Immediately wipe it down with a towel to get the ink off the surface of the spoon and only leave it in the letters.
Eventually, I hope we can get the garage cleaned out enough that the work bench is easier to work on (go figure) so I can try making some more of these for my garden... and maybe to sell in the shop. They're a lot of fun to make, pretty easy, and not that expensive of a project. Let me know if you try it! I'd love to see pictures. What kind of garden markers (if any) do you use?
Thursday, August 4, 2011
60 Miles is Shorter Than it Seems
By John Welsh
The reaction that people have when I tell them I will be walking 60 miles for breast cancer will never get old to me. This year is my fifth year walking in the Susan G. Komen 3-Day For the Cure and just today the owner of our company asked me about it.
"So, when's your next walkathon?" he always calls it a walkathon, and that's ok with me because the company has donated generously for every walk that I have done.
"It's in November this year. I'm doing San Diego this time."
"Oh, San Diego should be nice. Remind me how far this walk is."
I pause getting ready for the reaction, because even though he has heard it before, I know that the reaction will be good. I say, "It's 60 miles."
"60 miles! Jeez that's quite a long way!"
A lot of times when I tell people this little factoid they will respond similarly. Sometimes they will ask why on earth I would want to walk that distance. The answer to that question is quite simple, I will get to that later. Sometimes they tell me that they would rather just donate than walk that distance. Whatever the response is, it's usually pretty entertaining.
Maybe it's just me, but when I became a 3-Day walker I started to view distance a little bit differently. I didn't notice it right off the bat, but it has definitely changed my view. Here's just a couple of ways that happened:
So what's my scatterbrained point in writing about all this? I guess there's a couple. First off, when you get involved in the 3-Day for the Cure you're going to change in more ways than you think. Just look at me, I changed in just the simple way that I looked at mileage.
The second is for those of you that are on the fence about doing the 3-Day because you're concerned about the physical aspect of it. I'm not going to lie, 60 miles is a lot. My first year walking I was the only member of my team that made it all 60 miles and I think that was from pure stubbornness on my part. But you have to remember the point of all this. You're not doing the walk to walk 60 miles, you're doing it to save lives and to find a cure for breast cancer. If distance is your main reason for not doing the walk, I hope that you'll take the time to adjust how you view that distance and re-consider doing the 3-Day for the Cure.
The reaction that people have when I tell them I will be walking 60 miles for breast cancer will never get old to me. This year is my fifth year walking in the Susan G. Komen 3-Day For the Cure and just today the owner of our company asked me about it.
"So, when's your next walkathon?" he always calls it a walkathon, and that's ok with me because the company has donated generously for every walk that I have done.
"It's in November this year. I'm doing San Diego this time."
"Oh, San Diego should be nice. Remind me how far this walk is."
I pause getting ready for the reaction, because even though he has heard it before, I know that the reaction will be good. I say, "It's 60 miles."
"60 miles! Jeez that's quite a long way!"
A lot of times when I tell people this little factoid they will respond similarly. Sometimes they will ask why on earth I would want to walk that distance. The answer to that question is quite simple, I will get to that later. Sometimes they tell me that they would rather just donate than walk that distance. Whatever the response is, it's usually pretty entertaining.
Maybe it's just me, but when I became a 3-Day walker I started to view distance a little bit differently. I didn't notice it right off the bat, but it has definitely changed my view. Here's just a couple of ways that happened:
- I live in Texas. I think for most people, living in Texas means that you drive everywhere. It doesn't matter if where you are going is half a mile away (sometimes even less) or it's 30 miles away, you're hopping in the truck or SUV (this IS Texas) and driving there. It's hot, so you can't blame us too much. When I started training I would try to map out something along the walking paths near the house, nothing too exciting. My friends would ask how far I walked on a training walk and when I told them eight miles, they would comment, "I didn't know you could even walk that far in Flower Mound!" (the town that I lived in). It got me thinking, if I could walk this far for training walks, why can't I walk this far for other things. I started planning walks to meet the family when we were going somewhere. Soccer games, to get a drink at the convenience store. As long as it was somewhere that it didn't matter that I was a little sweaty or I didn't have to be there in short order I would start walking there and it's pretty cool to do that, especially when you think like this: I'm walking to the convenience store in the fight against breast cancer. It kind of makes a lot of the things you do seem a lot more meaningful.
- Kind of along the lines as the last item, when I would drive somewhere I would always keep an eye on the tachometer in the car so that I could see how far a place was to determine if it was walkable. I also keep an eye out for the all important sidewalks to make a better walking experience.
- The last way I'm going to talk about how my view of distance has changed took a little longer than the first year to come across, but it's probably the most important. That first year, while I was raising money for the cause I think my primary focus was making it through the 60 miles on the walk. Walking 60 miles was the key. When I think about it now, I don't do the 3-Day for the Cure to walk 60 miles. Don't get me wrong, I'll still walk that distance because I think getting out there and helping to raise awareness about the cause is just as important as the money. What I'm saying is that if I ended up with an injury that took me out of walking after 10 miles I would be ok with that. It took me a really long time to get to that point, there's a certain pride of being able to walk that many miles and tell people that you did it. Once you get there though, it makes walking 60 miles a lot more enjoyable without worrying about whether you will make it or not.
So what's my scatterbrained point in writing about all this? I guess there's a couple. First off, when you get involved in the 3-Day for the Cure you're going to change in more ways than you think. Just look at me, I changed in just the simple way that I looked at mileage.
The second is for those of you that are on the fence about doing the 3-Day because you're concerned about the physical aspect of it. I'm not going to lie, 60 miles is a lot. My first year walking I was the only member of my team that made it all 60 miles and I think that was from pure stubbornness on my part. But you have to remember the point of all this. You're not doing the walk to walk 60 miles, you're doing it to save lives and to find a cure for breast cancer. If distance is your main reason for not doing the walk, I hope that you'll take the time to adjust how you view that distance and re-consider doing the 3-Day for the Cure.
You're absolutely right, John! My team did a training walk weekend of 23 miles on Saturday and 21 on Sunday (something like that). When I got to work on Monday, people would usually ask me what I walked over the weekend. When I told them those numbers, they were usually in shock and thought I was crazy for doing it in the summer heat in Florida. As proud as I am about the mileage I accomplished being involved in the walk, it felt like it wasn't such a big deal when you consider the bigger picture. And now, knowing what I was able to do is a source of strength.
Thank you so much for sharing this, John!! Please check out John's blog at 60 Miles - 316,800 Feet Closer to a Cure and support his fifth 3 Day walk (that means he has walked 300 event miles & countless training miles while raising $35,555!!!) by visiting his fundraising page at the 3 Day. You can also follow him on twitter @60miles.
Next week, Gari Anne of Bead Lovers Korner and her blog of the same name will share with us a little bit about her experiences building her own website.
Wednesday, August 3, 2011
(Nearly) Wordless Wednesday: Thrift Store Finds
I dropped off a couple of older TV's at Salvation Army today and while I was there, I did a little looking around. I usually find some glass jars or bottles to keep on hand for my personal herbal concoctions at thrift stores, but today I found all kinds of good stuff!
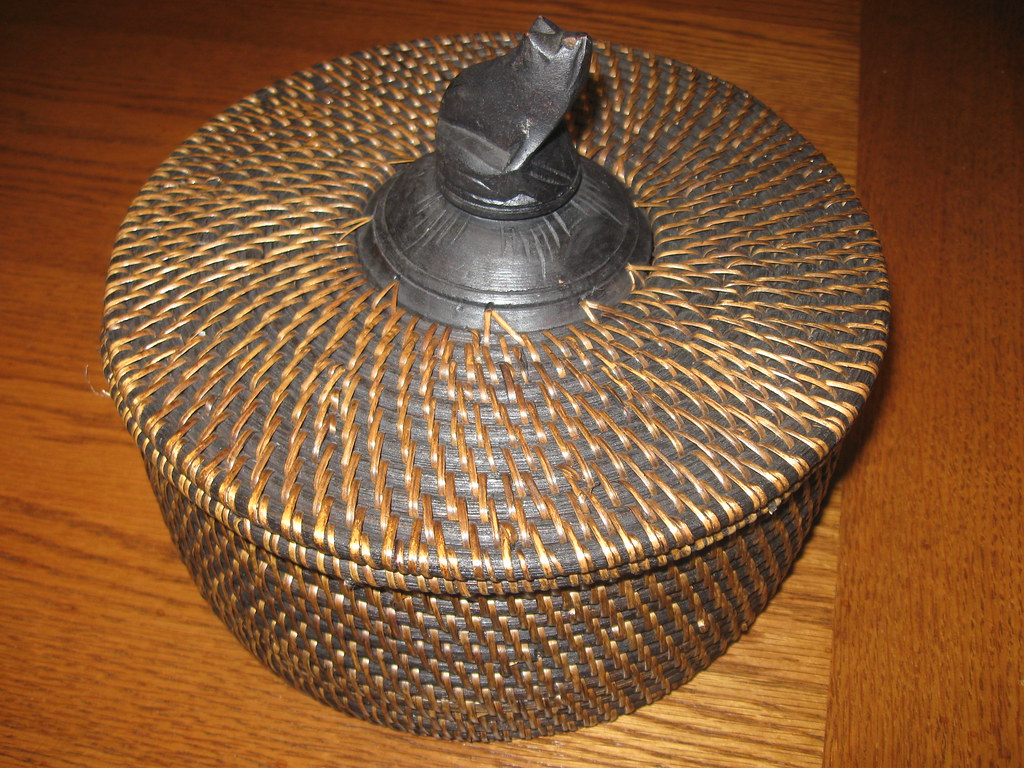 I was looking for a basket or something for Jack the Cat's toys and found this lovely toy chest for him.
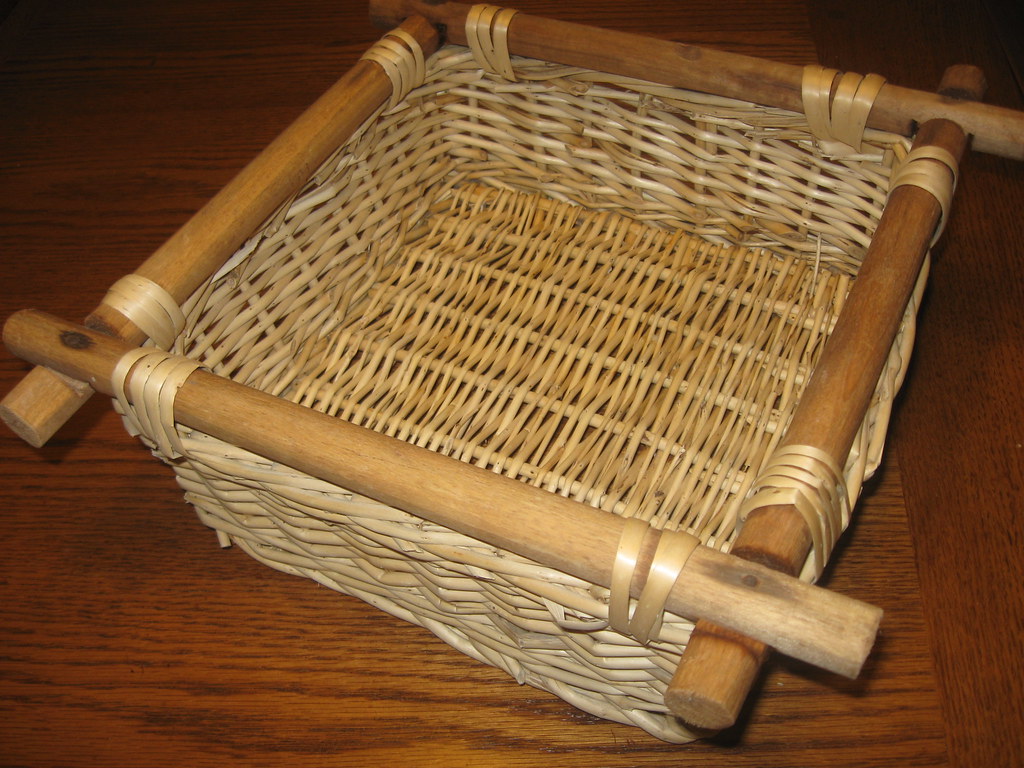
I was also looking for something to store my weights and various workout paraphernalia. A few things don't fit, but this will do for now.
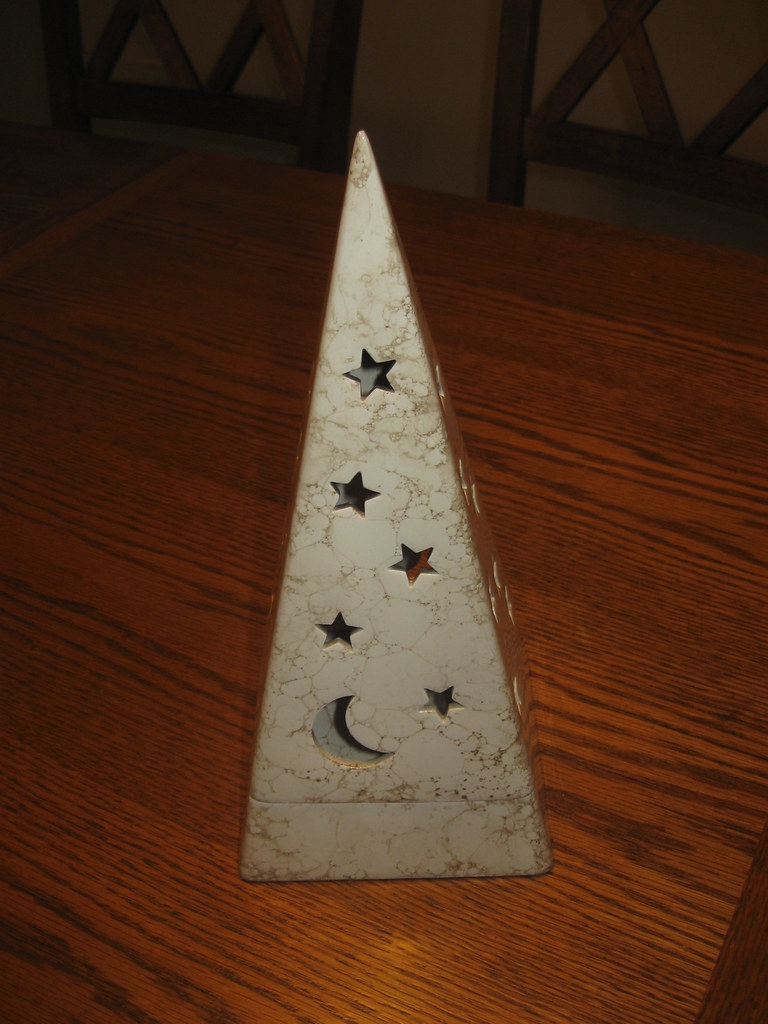
I almost didn't get this luminary, but I thought it was pretty and might be able to use it in listings for my shop. In hindsight, I probably shouldn't of gotten it: when I got home & inspected it, there were various chips and cracks that I didn't see at the store.
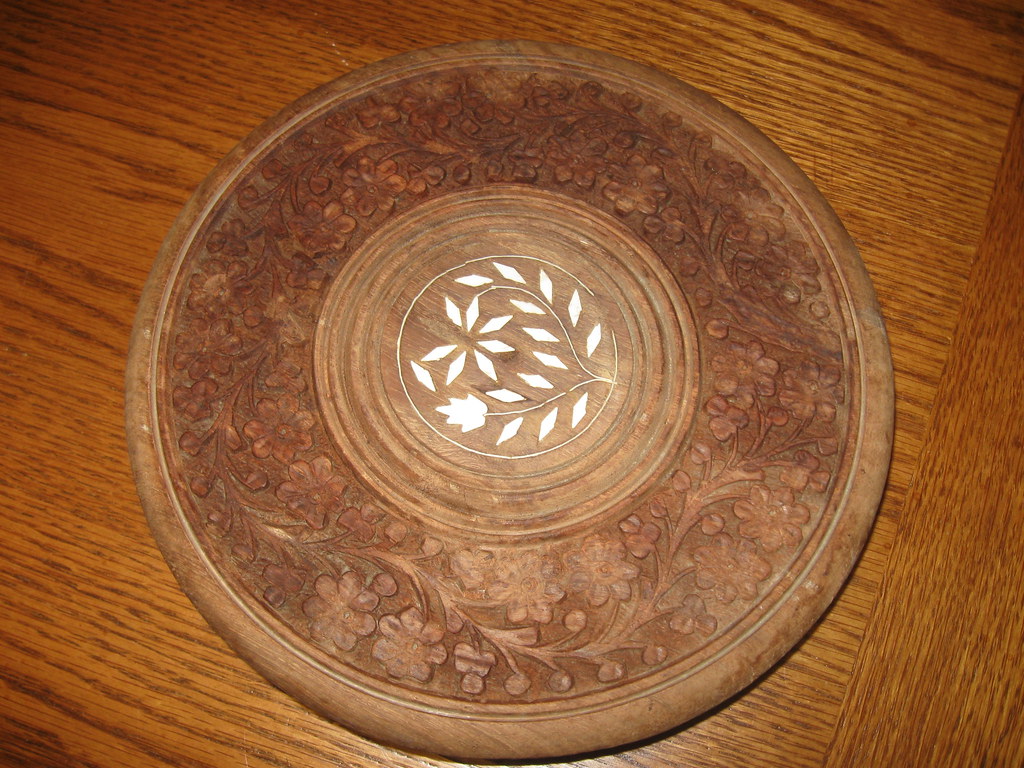
I saw this and it reminded me of a similar carving and design on an incense holder that I have and love. I'm not sure if this is supposed to be a hot plate or what exactly I'm going to use it for yet. It might also be a prop for listings.
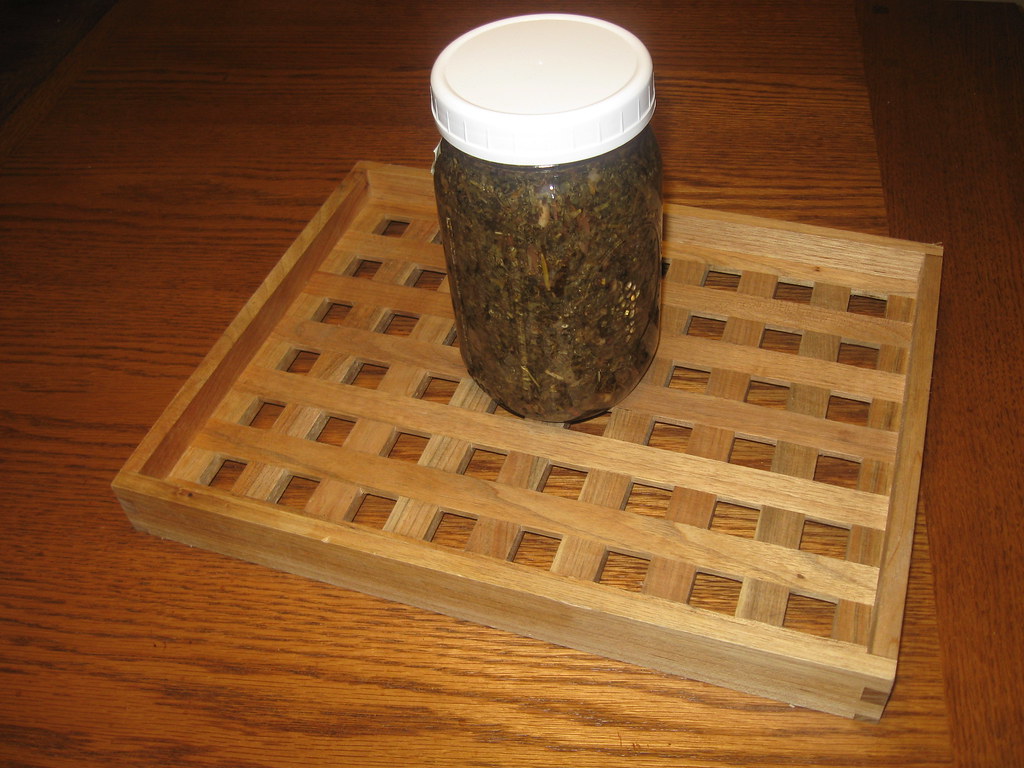
I was looking for a lazy susan or some kind of tray for keeping my herbal concoctions together, out of the way, and easily movable. This should work.
And last, I found a few various bottles, jars, and spoons. I don't have a plan for the jars yet, they're just good to have around. I'm thinking that the bottle will be for storing herbal vinegar. Those spoons? I'm going to play with making garden markers out of them.
All in all, some decent booty for $20!
I was also looking for something to store my weights and various workout paraphernalia. A few things don't fit, but this will do for now.
I almost didn't get this luminary, but I thought it was pretty and might be able to use it in listings for my shop. In hindsight, I probably shouldn't of gotten it: when I got home & inspected it, there were various chips and cracks that I didn't see at the store.
I saw this and it reminded me of a similar carving and design on an incense holder that I have and love. I'm not sure if this is supposed to be a hot plate or what exactly I'm going to use it for yet. It might also be a prop for listings.
I was looking for a lazy susan or some kind of tray for keeping my herbal concoctions together, out of the way, and easily movable. This should work.
And last, I found a few various bottles, jars, and spoons. I don't have a plan for the jars yet, they're just good to have around. I'm thinking that the bottle will be for storing herbal vinegar. Those spoons? I'm going to play with making garden markers out of them.
All in all, some decent booty for $20!
Don't forget to stop back tomorrow for a special 3 Day guest post from John of 60 Miles: 316,800 Feet Closer to a Cure .
Subscribe to:
Posts (Atom)