Showing posts with label tutorial. Show all posts

Thursday, August 11, 2011

Getting Started Building Your Website


By Gari Anne of Bead Lover's Korner

Deciding to create a new website can be a little daunting, but just like anything in life it is the challenge ahead and the goal at the end that leads you to experience and knowledge of things that you would ordinarily only dream of doing. Many years ago I decided to open an online business on EBay selling beads and other items that I thought were cool. That worked pretty well and eventually I needed a website, too. I am now on my 3rd website, and each time I upgraded to something a little better to stay in step with technology and incorporate more functions. If you are selling products, the shopping cart and how it is connected to the payment gateway is very important, as well as ease of use for the customer. That is where I become stupid, it is tricky and I really don't have time to learn that end so on this third website I hired an agency with design, technical and promotion experience to help me out. Most developers will only set things up and load maybe 50 products. After that they teach you and you have to do all the work, unless you want to pay them a whole lot more money. Really you are better off doing it yourself anyway, because you know your product better than they do.


I learned a few things from these three different website experiences, and the most important thing I learned is that while you need someone to help you with all the technical mumbo jumbo and programming, many times you are better off doing it yourself. Once you find this person to help you out, hook everything up correctly and pay their fee, you can never find them again! Then you're in a real mess and there's no one around  so you just have to wing it and figure things out for yourself. Everyone knows someone who knows html or programming but they are like Gnomes hiding under a rock or in the trees. When you go looking for them again, they have up and vanished!

A lot of websites today come with built in editors that will do the html for you. But it's always a good idea to know a little of the basics like how to make things bold, make something italic, etc. Lots of times those editors get all jumbled up with different things everytime you change something, so you can just view the code and take out all the extra stuff if you know what to look for.

Basic html examples:
For more instances this is a great source http://www.ncsu.edu/it/edu/html_trng/basic_commands.html 

<p> causes a line break and adds a trailing blank line for paragraphs, to end a paragraph use this at the end </p>
<br> causes a line break with no trailing blank line if you just want to bring something down one line
This is a <b>boldface</b> tag.
This is how boldface appears.
This is an <i>italic</i> tag.
This is how italics appear

After those few things it's all pretty easy if you take things in steps. If you try to do everything all at once it is very overwhelming! Here are a few other things to think about:

Domain names and hosting: Match your domain with your brand. Most hosting companies can help with your domain name, but be sure to get a hosting company that has real people working there so you can talk to someone if you need help.

Branding: Use the same colors, logos, design (if possible) in all other areas like Facebook, Twitter, Etsy, Blog etc. This way the customers are used to seeing the same things and will know it's YOU!

Image: Decide what kind of image you want to portray to the world, what kind of customers do you want, what do you want the customer to feel when they see your front page? Do you want them to read or buy? Think of things like that to help put together what your image will be in their eyes.

Photos: Invest in a good camera and photo editing program, it really makes a difference in the quality of the picture and what your customer sees. Etsy has some great write ups on photography. A picture REALLY is worth a thousand words!

Image names: If you are selling products and you have a LOT, be sure to start using a good image naming system so that you can find the pics when you need to. I use the manufacturer's product code along with a prefix that I assign to them. Example: BI-BS202 -  which is used for the image and the item code. Image management can be time consuming if you don't have some organization in the beginning.

Organize products: Do an outline or spreadsheet to help decide how to organize your products so the customer will have an easy time finding what they want. You may change your mind later, but if you have an outline in the beginning it makes it easy to know what you have, how products might work with each other as cross selling, etc.


Product Descriptions: You can do it however you want, but I think it should be fairly short. When people are shopping on the internet they usually know what they want and will only skim your descriptions.

Security: Make sure your site is secure from hackers, malware, and that encryption is high so there is no risk of your customers information getting into the wrong hands.

Marketing: In my opinion pay per clicks are a waste of money unless you have the time to sit and really figure out how the company presents your ads. I think Facebook, email marketing and good SEO (Search Engine Optimization) are your best bet. Word of mouth is the best advertising of all!

Gari Anne, thank you SO much for sharing all of these great tips!!  I for one know next to nothing about html and really appreciate you taking the time to explain some of the basics.  Your website looks really great!  Check it out:  Bead Lover's Korner website, Bead Lover's Korner blog, and Bead Lover's Korner on Etsy.  Whew!  =)


Next week, we welcome back AJ from ErtheFae's Meandering Thoughts for another installment of ErtheFae's Faerie Lore.


Saturday, August 6, 2011

Spoon Garden Markers Tutorial

I've been seeing garden markers made out of spoons everywhere lately.  I don't really worry so much about marking my herbs right now because I'm the only one working with them and can identify them.  Once we get the garden bed going, though, it's entirely possible that Scott might be more involved so I might need some markers out there.  Being the crafty, DIYer that I am, I figured that I could try making them myself.

Various Bottles, Jars, & SpoonsThe project started with a trip to the thrift store to pick up a bunch of spoons.  I think they were maybe $.10 each, so this project doesn't really require that much of an investment.

The big tools you'll need include a hammer and a stamping set.  You can get the stamps from a craft store, but I highly recommend someplace like Harbor Freight for a project like this where they will only cost around $10-20 (depending on the size).

You'll need a flat surface to hammer out the spoons.  You can probably use concrete blocks or something similar.  I have a vise (which was in the garage when we bought the house - score!), so I used the steel block on it.  The smaller spoons were easier to hammer out than the bigger ones.  I couldn't find ours to try it, but I'm wondering if a  small sledgehammer might work better than the hammer.  Don't be afraid to get some strength behind your swing (they are stainless steel, after all) and make sure you're holding the hammer properly (don't hurt or embarrass yourself with a bad grip!).

Spoon Garden Markers


Next step, is stamping.  I used my Fine Point Sharpie and evenly spaced out dots where my letters would go so I knew that the word would fit.  Make sure you do this on the front of the spoon so that the pattern on the handle shows.  When you look at the stamp, the letters are going to appear backwards to you so that they are facing the right way when put to the metal.  Line up your first stamp on your first dot and strike it with your hammer. A good, solid strike or two should do the trick.  Multiple strikes of lesser force don't really work as well because it's more likely that the stamp will move.

Spoon Garden Markers


My vise is wedged into a corner of the very crowded workbench in the garage and I didn't have much room to work, so I had a hard time getting the leverage I needed to get my stamping done right.  Made me sad, but for now, it's the best I can do.

Spoon Garden Markers


If you want, you can darken up the lettering, too, to make it easier to read.  Color in the letters with a Sharpie, being sure to get into the grooves of the letters.  Immediately wipe it down with a towel to get the ink off the surface of the spoon and only leave it in the letters.

Eventually, I hope we can get the garage cleaned out enough that the work bench is easier to work on (go figure) so I can try making some more of these for my garden... and maybe to sell in the shop.  They're a lot of fun to make, pretty easy, and not that expensive of a project.  Let me know if you try it!  I'd love to see pictures.  What kind of garden markers (if any) do you use?

Wednesday, June 1, 2011

30 Days of Creativity - Day 1: Sugar Scrub Recipe

I'm very excited to be taking part in the 30 Days of Creativity challenge and had a bunch of ideas of what I could to do for my first day.  But then, one of my 3 Day Tweeps (3 Day walkers on Twitter) asked me for an exfoliating sugar scrub recipe.  Decision made!  This is for you @fatgirlwalkin!

Making a sugar scrub is a super fun, easy project to pamper yourself.  I think between gathering ingredients, making it, taking pictures, and cleaning up, it took me all of about 15-20 minutes.  If you don't take pictures or hand wash your dishes, it will take less than half that amount of time.  It can be as simple as combining sugar and oil together for a quick, basic scrub.  I got a little more creative (part of the point of the 30 Days of Creativity, after all)...

Let's gather our ingredients:
sugar scrub - ingredients

1 cup of sugar
I just used regular white sugar because it's what I had, but you can also use brown, raw, or cane sugar or any combination for different scents/consistencies.

13 tsp olive oil
Okay, that really is an approximate amount.  I've seen recipes calling for 10 tsp and some calling for a 1:1 ratio with the sugar.  I usually start with around 10 tsp (to a cup of sugar) and then eye ball it from there.  I don't like having too oily of a scrub, so I usually just make sure everything is moist plus some.  Also, you can use pretty much any oil or combination of oils you like; I just really love olive oil & it's medicinal qualities.

3-4 tblspn Epsom Salts
Again, that's an approximation.  Epsom salts are amazing for you (it draws toxins from the body, sedates the nervous system, reduces swelling, relaxes muscles, it is emollient, a wonderful exfoliator, and more) and they add texture to the plain white sugar.

3 bags of green tea
Just rip open the bags and empty the contents.  I drink green tea all the time and use green tea infusions in many concoctions.  The antioxidants in green tea and it's anti-inflammatory properties are both excellent for the skin.

2 tblspn honey
Honey has many wonderful qualities but the #1 reason for using it in this recipe is that it's a natural humectant which means that it seals moisture into your skin.  

Vitamin E
Totally optional, but I like to include it because it's good for your skin in addition to being a natural preservative.  You can empty the contents from a couple of capsules or use a dropper full.

Essential Oil
I used lemon because I love the refreshing scent and it also has preservative properties.  Other popular options include orange, vanilla, lavender, ylang ylang, etc.

*This is not an exact science and it's meant to be fun, so use your own judgement with measurements and ingredients!*

Some simple instructions:
  • First step is to combine all of your dry ingredients.
sugar scrub - mix dry ingredients


  • Mix in your olive oil next.  Followed by the honey, then the Vitamin E and essential oil.
sugar scrub - mix wet & dry ingredients


  • Last, store in an air tight container.  Try to keep moisture out including during use.  *Please be careful if you decide to store your sugar scrub in a glass jar as your hands WILL be slippery when you use it!*

sugar scrub - store in an air tight jar

For gift giving: you can add a pretty label to it or even put a seashell in it to use as a scoop.  I've given away a few of these and everyone raves how soft their skin is after use.  This one, however, is going in my shower.

sugar scrub - finished product

Enjoy!

Monday, July 20, 2009

Upcycling Electrical Wire to Make Copper Chain Maille


I always get a mix of reactions from people when I share with them that about 90% of the copper I work with is actually upcycled electrical wire: confused, mystified, excited, etc. Basically, electricians usually have some wire leftover after a job and I've been able to get my hands on some of it from time to time. What that means, however, is that I have to strip the protective plastic coating in order to get to the gorgeous copper wire hiding underneath it. The wire usually ranges in gauge sizes between 15 and 18 and they are entwined in each other so even after you have the wire stripped, it still needs to be separated. Stripping wire is a project, but so worth it. If you are given the opportunity and want to give it a try, here are a few pointers. Be sure to read through all instructions and cautions before you attempt to strip wire yourself.


What you'll need:
-length of electrical wire
-utility knife
-eye protection
-a cutting board, cork board, mat or a bench or work table that can get scratched up if the utility knife slips


How to do it:
-Wearing your eye protection, place your electrical wire on your cutting surface and click open your utility knife. The knife doesn't have to be out very far (in fact, it shouldn't be), just a couple of clicks should do it.
-Start at one end of your wire and cut into it with your knife, making a slice about 2" long. Put down your knife and start to peel the plastic back. Right now, you're not trying to cut all the way through the plastic coating. You are simply taking off the very outermost sheer plastic shell. Continue to cut and peel until the outer layer is completely off.
-Repeat the process, this time cutting through the thick plastic that protects the copper. The trick is to cut deep enough to split the coating, but not so deep that you mar the copper wire underneath. Stop cutting about an inch away from the end of the wire, you should be able to pull this off fairly easily.
-Now, you can either untwist the different gauges or leave them entwined until you're ready to use them (that's what I usually do).


CAUTIONS:
Take great care not to cut anywhere near your fingers. I usually keep one hand holding down the wire on the opposite side of the direction the knife is cutting.

Take your time and go slow. Rushing leads to injury when you're working with a utility knife.

I know I said it before, but I'll say it again: wear eye protection.

Work with short cuts at a time. It's easier to manage and there's less chance of injuring yourself with smaller cuts.

If you take a break or walk away for any reason, close your knife!!

If you get tired, stop and come back to it later. After stripping wire for an hour you are bound to get tired and that's when mistakes happen.


*If you do strip some wire for yourself , I'd love to see what you make! Share links in the comments below.*

Wednesday, October 3, 2007

Custom DIY Necklace Kits

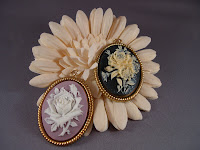
I've been playing around with the idea of listing some DIY Necklace Kits at my other Etsy shop: Beach Bum Creations. I finally listed one today for Scott's mom, Jean. A while ago, I showed her the basic bead stringing techniques and, needless to say, being the creative woman that she is, she got hooked. At her request, I put together a kit with Cameo pendants, enough strands of beads to make the necklaces nice and long, seed beads to match, gold findings, as well as some stringing tools (chain nose pliers and wire cutters).


2 Custom DIY Cameo Necklace Kits RESERVED FOR JEAN

Her interest in the kits, has prompted me to revisit the idea of listing these DIY Necklace Kits. They will include a strand of gemstone beads, matching seed beads, sterling silver findings, stringing wire, a instruction pamphlet with color pictures, as well as an opportunity to receive 20% off the purchase of a pendant with the kit. I'll start listing them soon! However, if you're interested before that, just drop me a convo through my Beach Bum Creations Etsy shop.

Friday, July 6, 2007

Will Copper Turn My Skin Green?

Personally, I love copper. I love it when it's bright and shiny and even after it starts to oxidize and get darker. There's a bit more weight to it than bright aluminum or even sterling silver and has such a beautiful warm glow. I love mixing it with other metals for a two tone look. Also, I'm not an expert, but there is a lot of anecdotal evidence to suggest it might help people reduce the pain of arthritis.

I do get a lot of questions and comments from people about whether or not copper will make their skin turn green. Copper oxidizes by darkening and then turning green, just as sterling does so by tarnishing and iron does so by rusting. It's a natural process and the environment determines how quickly it happens. It happens faster in high humidity, but the speed of oxidation is also affected by the body chemistry of different people. Some people wear copper every day and it never turns green, some people wear it and it turns in one day. Some people can turn sterling dark in one day, too. We're all different in that way. I guess I'm lucky, because it actually takes quite some time for copper to even begin to show signs of oxidation for me and it also doesn't turn me green, so I get to enjoy wearing this lovely metal!

If you check out my last post, you'll find a quick, easy way to clean your copper if it does start to oxidize. Enjoy!

Tuesday, July 3, 2007

Etsy Bloggers Street Team Theme: Orange

I've been racking my brain trying to think of a fantastic project I can do using orange jump rings or O-rings, but not having any in stock at the moment put a serious damper on that! But then, I realized that I already have some orange already in both of my shops! I've got some orange pendants in my original Etsy shop, Beach Bum Creations.


But, even more exciting than supplies is something that I've made. Although, not really orange, copper's as close as I've got! You can find this Mobiused Rosette Bracelet in Athena's Armoury, my new shop for chain maille.


That's probably one of my all time favorite bracelets. I made one for myself and always get compliments on it. It was made using 18 gauge copper rings with, I believe, 1/4" inner diameter. It's a variation on the classic Euro 4-1 chain maille weave (most commonly seen in armour).

Cleaning Copper
I've had mine for quite some time now and it's starting to get a little dull, but that's easily fixed. Just mix together some lemon juice and salt, add bracelet, then slosh around a little bit. However, you must make sure you rinse it off!! The salt will make the bracelet crusty if you let it sit and the acid in the lemon juice will eat away at the metal. If you want to make extra certain it's clean of the lemon juice solution and perhaps keep the shine a bit longer, you can make a paste with baking powder and water and rub it on the copper. This will neutralize the acid. Then, of course, rinse again and dry. Beautiful, shiny copper once again!