Showing posts with label DIY. Show all posts

Thursday, June 23, 2011

Outdoor Decorating

I had been thinking about making some garlands to hang in our lanai to festivize the place.  My plan was to string wine corks, shells, and beads on twine.  Well, stringing the corks on twine was a bitch, drilling holes in shells creates a very aromatic dust, and the pretty glass beads that I wanted to use didn't have big enough holes for the twine.  In short, the project was seriously sucking.  And yet, I still managed to get 5' done.

And then my associate discount at the popular craft store got bumped up for a few days and they just happened to have some really pretty starfish and shell garlands on twine.  Granted, this is something that I could have easily made myself, but it was well worth it with my discount since I still would of had to purchase supplies and spend the time making it.

New Starfish Garland!

I got enough to hang on the side and back but the corner is empty.  I might get some prayers flags to string across the corner.  I think they would look so pretty with their vibrant colors waving in the breeze.  I particularly like these Inspirational Prayer Flags by Cazmira


I had an idea a while ago to add some solar lanterns around the lanai, too, but just never invested in the project.  I still think it will look pretty, but need to wait for some disposable income now.

I would love to get an outdoor rug, but when it rains, we just have too much standing water for that to be practical.

It's really starting to come together out there and become a really happy place!

Tuesday, June 7, 2011

30 Days of Creativity - Day 7: Mason Jar Soap Dispenser

I've been seeing these everywhere online lately and love them.  Actually, I pretty much love the idea of repurposing Mason jars in general.  We have gone through several nice glass or metal store bought soap dispensers and none of them seem to ever hold up as well as the disposable plastic ones you get with the soap already in them.  This seemed to be the perfect solution!  It's a groovy glass and metal container with a pump that works.

Mason Jar Soap Dispenser

Heather Bullard's blog tutorial was my starting point.  I didn't have a beautiful vintage mason jar, so I just used what I had on hand.  My lid is the modern canning lid and not the single piece lid that she used, but that's okay.  I decided that I wasn't worried about it being water proof, so I didn't epoxy it.  Plus, if the pump stops working, I can easily replace it since isn't epoxied.  I did, however, put a washer on it to better secure the pump and it worked out really well (it's on good and tight).

Next step: finish all of the store bought liquid hand soap we have in the house, so I can make that myself, too!

Friday, June 3, 2011

30 Days of Creativity - Day 3: Making Seals with Glue Sticks & DIY Embossing Ink

Now that I've started adding the Apothecary to the Armoury with soap, I'm really eager to start adding my other herbal items (first on the list is my Sore Muscle Salve).  One of the things I'd like to incorporate into the packaging is a wax seal for a little historical flavor.

I read that you can simply use a glue gun with colored glue sticks and a metal stamp and thought that would be brilliant.  Of course I love the look of wax and the fact that it's much more historically correct, but I'm also thinking about ease of use and trying to keep things economical.  So, I went out and ordered me a metal stamp with the letter "A" on it.  I didn't realize that getting glue sticks in colors would be that hard to do... my friendly local craft store had clear and glitter.  So, I opted for the glitter (ooooh, sparkly!) and hoped for the best.

One minor little detail that I missed out on was that the metal stamp actually should be coated in clear embossing ink before pressing it into the wax/glue.  Damn.  I didn't let that deter me from playing with my project today!  This *is* part of the 30 Days of Creativity, after all!  So, I did a little research and found out that clear embossing ink is primarily glycerin.  Well, I have that!  I did a little more reading and made up my own version of clear embossing ink with what I had on hand.

I squirted out a little glycerin into a bowl and then put in a teeny tiny amount of rubbing alcohol for fast drying and another teeny tiny amount of vegetable oil for easy removal of the metal stamp.  Mixed all together and I was ready to go!

Meta Stamp Sealing & DIY Embossing Ink

I found that a couple pulls of the glue gun trigger was plenty of a pool for my size stamp.  After a dip in the homemade embossing ink, I used the spoon to get any excess off the stamp.  I played with different size pools, different glue temperatures, different pressures, different amounts of time before peeling off the stamp, etc.

Ultimately, I think my little homemade solution works, but it makes the glue look matte.  I wonder if that's too much oil?  I'll have to play with different amounts later.  I also realize that although the sparkly glitter is pretty, the stamp doesn't really show up that well in it.

Metal Stamp Sealing & DIY Embossing Ink

Well, it was fun, I learned something, and I'm another step closer to fun packaging for my shop!

Thursday, June 2, 2011

30 Days of Creativity - Day 2: Homemade Dishwasher Detergent

I love to make and use my own cleaning products.  It all started when the harsh scents from the chemical cleansers had been doing a number on me: they were making it difficult for me to breathe and giving me headaches and making me dizzy when I cleaned.  It was only an after thought that not only are my homemade cleansers better for me, but they are also better for the environment and my bank account.  Even though an after thought, that made me love using them even more!

We had a huge supple of dishwasher detergent from Costco and I didn't want to waste it, so we're still using it.  Unfortunately, however, our dishes (mainly glasses) are coming out with a cloudy residue on them lately.  I washed them all by hand and it came off which makes me think that it's the detergent.  I don't know why all of a sudden it's happening but it encouraged me to look into making a homemade dishwasher detergent.  I found a very similar recipe used on a few different websites, so I thought I would give it a try.  I've always been partial to liquid detergent but I read in a few places that powdered detergent is better (although, I'm not really sure why).

Day 2 - Homemade Dishwasher Detergent

Ingredients:
1 Cup Borax
1 Cup Baking Soda
1/4 Cup Salt
1/4 Cup Citric Acid
30 Drops Lemon Essential Oil

Yes, I like to buy ingredients that I know I'll use constantly in bulk.  Like baking soda.  It and vinegar are pretty much the only things I need to clean.

Borax is a water conditioner, so in theory, it should help with our hard water.  I think (and I can be wrong here) the citric acid is to help break down grease.  The salt and baking soda seem like they will be the scrubbing agents.  Lemon essential oil smells pretty, but it is also antiseptic.

Day 2 - Homemade Dishwasher DetergentMix everything together and store in an airtight container.  The mixture may clump (it's only natural for that to happen with baking soda), so just shake up your jar before each use.  All you need is 1 tablespoon per load of dishes.  Also, use white vinegar in your rinse cycle.  The stuff is amazing.


I saw another recipe that looked interesting that uses a tablespoon each of Borax and Washing Soda plus 2 teaspoons of sea salt to run a load.

I had a couple people ask me after yesterday's Sugar Scrub post where I get my jars and since I used a similar one today, I thought I'd include that info.  Many of the jars I use around the house are from thrift stores.  I scrub the hell out of them and/or sterilize them, depending on the use.  I also use Mason Jars all the time.  I usually find them at Ace or other smaller hardware stores for less than you can get at grocery or craft stores.  Specialty Bottle carries a nice selection of bottles and jars at good prices if you're going to buy in bulk.

Do you use a homemade dishwasher detergent?  How's it working for you?  Is it a similar recipe?


UPDATE 6/4/11: I used this recipe for the first time last night & it worked really well!!

Wednesday, June 1, 2011

30 Days of Creativity - Day 1: Sugar Scrub Recipe

I'm very excited to be taking part in the 30 Days of Creativity challenge and had a bunch of ideas of what I could to do for my first day.  But then, one of my 3 Day Tweeps (3 Day walkers on Twitter) asked me for an exfoliating sugar scrub recipe.  Decision made!  This is for you @fatgirlwalkin!

Making a sugar scrub is a super fun, easy project to pamper yourself.  I think between gathering ingredients, making it, taking pictures, and cleaning up, it took me all of about 15-20 minutes.  If you don't take pictures or hand wash your dishes, it will take less than half that amount of time.  It can be as simple as combining sugar and oil together for a quick, basic scrub.  I got a little more creative (part of the point of the 30 Days of Creativity, after all)...

Let's gather our ingredients:
sugar scrub - ingredients

1 cup of sugar
I just used regular white sugar because it's what I had, but you can also use brown, raw, or cane sugar or any combination for different scents/consistencies.

13 tsp olive oil
Okay, that really is an approximate amount.  I've seen recipes calling for 10 tsp and some calling for a 1:1 ratio with the sugar.  I usually start with around 10 tsp (to a cup of sugar) and then eye ball it from there.  I don't like having too oily of a scrub, so I usually just make sure everything is moist plus some.  Also, you can use pretty much any oil or combination of oils you like; I just really love olive oil & it's medicinal qualities.

3-4 tblspn Epsom Salts
Again, that's an approximation.  Epsom salts are amazing for you (it draws toxins from the body, sedates the nervous system, reduces swelling, relaxes muscles, it is emollient, a wonderful exfoliator, and more) and they add texture to the plain white sugar.

3 bags of green tea
Just rip open the bags and empty the contents.  I drink green tea all the time and use green tea infusions in many concoctions.  The antioxidants in green tea and it's anti-inflammatory properties are both excellent for the skin.

2 tblspn honey
Honey has many wonderful qualities but the #1 reason for using it in this recipe is that it's a natural humectant which means that it seals moisture into your skin.  

Vitamin E
Totally optional, but I like to include it because it's good for your skin in addition to being a natural preservative.  You can empty the contents from a couple of capsules or use a dropper full.

Essential Oil
I used lemon because I love the refreshing scent and it also has preservative properties.  Other popular options include orange, vanilla, lavender, ylang ylang, etc.

*This is not an exact science and it's meant to be fun, so use your own judgement with measurements and ingredients!*

Some simple instructions:
  • First step is to combine all of your dry ingredients.
sugar scrub - mix dry ingredients


  • Mix in your olive oil next.  Followed by the honey, then the Vitamin E and essential oil.
sugar scrub - mix wet & dry ingredients


  • Last, store in an air tight container.  Try to keep moisture out including during use.  *Please be careful if you decide to store your sugar scrub in a glass jar as your hands WILL be slippery when you use it!*

sugar scrub - store in an air tight jar

For gift giving: you can add a pretty label to it or even put a seashell in it to use as a scoop.  I've given away a few of these and everyone raves how soft their skin is after use.  This one, however, is going in my shower.

sugar scrub - finished product

Enjoy!

Friday, September 18, 2009

Friday Finds - DIY Kits

I love learning new skills, doing things with my hands, creating... It truly makes me happy! There are so many wonderful kits and tutorials available to try, the hard part is deciding which one to try first. Here are a few that I've been dying to try. Pick them up before I do. You've been warned.


Tuesday, July 1, 2008

Quizes, DIY Videos, and Boredom

It's been a very, very slow day at work for me. I've literally spent the entire day taking online quizes and watching DIY videos at Threadbanger.

The first quiz of the day informed me that:

53% Geek

OnePlusYou Quizzes and Widgets


The last quiz I took, determined which Tarot card I am:

You are The Moon

Hope, expectation, Bright promises.

The Moon is a card of magic and mystery - when prominent you know that nothing is as it seems, particularly when it concerns relationships. All logic is thrown out the window.

The Moon is all about visions and illusions, madness, genius and poetry. This is a card that has to do with sleep, and so with both dreams and nightmares. It is a scary card in that it warns that there might be hidden enemies, tricks and falsehoods. But it should also be remembered that this is a card of great creativity, of powerful magic, primal feelings and intuition. You may be going through a time of emotional and mental trial; if you have any past mental problems, you must be vigilant in taking your medication but avoid drugs or alcohol, as abuse of either will cause them irreparable damage. This time however, can also result in great creativity, psychic powers, visions and insight. You can and should trust your intuition.

What Tarot Card are You?Take the Test to Find Out.


Yup, I'm bored. . .


Tuesday, March 4, 2008

Cramming to Get Ready for Craft Fair on Saturday!


This was my table from a psychic fair a friend from work invited me to show at. This is from a LONG time ago when I was involved with beaded and wire wrapped jewelry, hemp, and candles. I had only just discovered chain maille and only had three pieces of it with me.

I found out yesterday that I can vend (free of charge) at a fair on Saturday. Well, it's really a grand opening of an art and activity center for kids that is hosting a craft fair as part of their grand opening celebration. I had been reluctant to do it because I didn't think it would be my demographic, but the more I thought about it. . .

Well, I'm hurriedly trying to figure out my display and some more kid friendly items. I'm a little stressed out about it because I have so little time to prepare. The way I figure it: worse case scenario, I get to spend the day enjoying being outside which is a luxury I rarely afford myself; best case, well, we all know best case is making some sales and meeting some people. I think I'm going to bring some of my beaded and wire wrapped jewelry, hemp for the kiddies, and my DIY Necklace Kits (with gemstones and sterling silver findings) in addition to my maille to try and tap more people's interest.

I also think I'm going to bring some rings and my pliers and do some demos. I wish I was in the middle of a large project to show and make it more interesting.

My to do list also includes all kinds of businessy kinds of things that need to get done, too, like: price tags, promo stuff, displays, bags for purchases, maybe making some kind of banner.

Here are some awesome fair tips from Amanda (aka MrsDragon) at her blog The Dragon's Wares.

What do you do to get ready for a fair? What's the one fair item you can't live without?

Monday, February 11, 2008

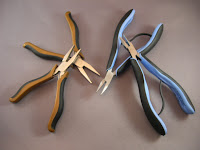
I Love My Tools

However, I don't know what's going on with them lately. A few weeks back, I was weaving bright aluminum with my lovely Lindstrom flat nose pliers. All of a sudden, there was a snap and then something hit me (hard) in the shoulder. I just thought that a ring snapped, so I went to pick up another one and noticed that half of the jaw on one of my pairs of pliers was gone! After the initial confusion, I went into shock, and then got very upset. That never, ever should have happened with those pliers: they are known to last for decades. Luckily, they are covered by a lifetime guarantee and I'm expecting a brand new pair to arrive in the mail this week. Yay!


Over the weekend, I had quite a few projects going on. One of which is filling an order for an Uber Chain Maille Dice Bag (it's the size of a Crown Royal bag!). I coiled and cut rings until I ran out of wire and then had to tumble them to remove any burrs and make them nice and shiny. I walked away and when I came back, the barrel on my tumbler had stopped rotating. I opened it up and the belt finally broke on the thing. In not one, but three places! So, I got out my mini screwdrivers and went at it. Eager to get my hands dirty and fix my tumbler, I forgot to unplug it and suffered a mild electrocution. Sigh. All was well after that: I got the new belt in place, screwed it all back together, and finished tumbling my rings!


Apparently, the tumbler available from Harbor Freight has a reputation of easily breaking belts. I've had mine for two years and this is the first time it's happened. That said, if you experience belt problems with your Harbor Freight tumbler there is a cheaper alternative to purchasing a new belt. An experienced mailler I know recommended using the heavy duty rubber bands from broccoli. Apparently, he's been doing that for years to much success! Happy tumbling!

Saturday, February 9, 2008

More Dice Bag Options Coming Soon!


So, Dice Bags have been quite the belle of the ball in my shop. This past week, I got orders for all three different varieties that I currently have available! In the future, I look forward to being able to offer more color and metal options to meet this growing market!

Traditionally, Dice Bags have been used by gamer geeks who play Dungeons and Dragons. A comment made by Krummenacker (a fellow Fantasy Artists of Etsy Street Team member) made me start thinking about the characters in D&D and tailoring these bags specifically to them. Keep your eyes out for dice bags with inlays.

Hey all of you bloggers: check out these great tips from Timothy Adams Designs for getting some traffic to your blog. I've been really horrible about updating, so I need to work on that one. BlogRush sounds like a fun idea: I'll have to check it out! Also, I keep thinking about find more groups through Ring Surf for armourers, so that is on my list now, too!

Wednesday, October 24, 2007

Buy Handmade for the Holidays

I just took the pledge to buy handmade this holiday season. Will you?

I Took The Handmade Pledge! BuyHandmade.org

From the Buy Handmade website:
Buying handmade is better for people, better for the environment, and better for giving truly special and well-crafted gifts. The ascendancy of chain store culture and global manufacturing has left us all dressing, furnishing, and decorating alike. The connection between producer and consumer has been lost. Buying handmade helps them reconnect.

We encourage all consumers to be aware of the social and environmental implications of their purchases.

Wednesday, October 3, 2007

Custom DIY Necklace Kits

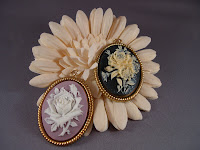
I've been playing around with the idea of listing some DIY Necklace Kits at my other Etsy shop: Beach Bum Creations. I finally listed one today for Scott's mom, Jean. A while ago, I showed her the basic bead stringing techniques and, needless to say, being the creative woman that she is, she got hooked. At her request, I put together a kit with Cameo pendants, enough strands of beads to make the necklaces nice and long, seed beads to match, gold findings, as well as some stringing tools (chain nose pliers and wire cutters).


2 Custom DIY Cameo Necklace Kits RESERVED FOR JEAN

Her interest in the kits, has prompted me to revisit the idea of listing these DIY Necklace Kits. They will include a strand of gemstone beads, matching seed beads, sterling silver findings, stringing wire, a instruction pamphlet with color pictures, as well as an opportunity to receive 20% off the purchase of a pendant with the kit. I'll start listing them soon! However, if you're interested before that, just drop me a convo through my Beach Bum Creations Etsy shop.